Nondestructive Testing
Nondestructive Testing
Nondestructive testing is used if the quality-tested components are to be used later. Modern precision measurement technology makes it possible to check even inaccessible areas for material and manufacturing defects.
What is nondestructive testing?
Nondestructive testing (NDT) or nondestructive inspection is the technical inspection of assemblies, parts and individual materials for possible defects. It is carried out without subsequent destruction of the tested material and without modification of its properties. It is necessary because, in extreme cases, faulty materials and structural defects even impair the safety of the part or building. Nondestructive testing methods work with thermal, mechanical and chemical stress to detect possible defects prior to commissioning. These defects include corroded surfaces, pores, cracks and inclusions in the material. Further nondestructive testing is required during operation of the system.
The standardized test methods are used in almost all industrial sectors, whether it concerns motor vehicles, airplanes, ships, machines or the quality assurance of buildings. They are carried out in accordance with the applicable DIN EN ISO standards, the American ASME standards and individual instructions from the customer. The test methods are based on energetic interactions. The type of energy that is suitable for them depends on the material to be tested.
What is the difference to destructive testing methods?
Nondestructive testing is carried out without damage or minimal impairment of the test object, as the designation already indicates. The manufactured part is inspected for its integrity using gentle test methods. In contrast, the material is damaged in such a way that it can no longer be used during destructive testing. Standardized test specimens manufactured specifically for this purpose are used.
Their destruction provides the designer with important information about which material is suitable and which geometry and dimensions the part still to be manufactured must have: Destructive testing is carried out to determine material characteristics. This is not the case with nondestructive testing. The material tester knows only whether he has to replace the inspected component or whether it is technically safe (inspection).
What are the test methods?
Nondestructive testing uses methods such as:
- Visual testing
- Ultrasonic testing
- Magnetic particle testing
- Penetrant testing
- Radiographic testing
- Eddy current testing
- CT scans

Visual testing (VT)
Visual testing is a test method in which the part is thoroughly inspected with the naked eye. Visual testing is often complemented by additional nondestructive materials testing. A distinction is made between direct and indirect visual testing. Direct visual testing requires an endoscope, a mirror and magnifying glass. In indirect visual testing, the assessing employee records the surface of the material by means of videoscopy and stores the image digitally. The visible quality defect is then increased and measured.
Ultrasonic testing (UT)
Ultrasonic testing is suitable for materials that conduct sound. It enables the detection of external defects and volume defects in plastic components, cast parts and welds. The tester applies a coupling agent and slowly scans the surface with the probes. In doing so, he works with different sound directions. The sound must be perpendicularly oriented to make any defects visible. Ultrasonic tests with 0.2 to 50 MHz provide information on the quality and wall thickness of the components and can be used for nondestructive weld testing of nickel alloys and austenitic steels.
Magnetic particle testing (MPT)
Ferromagnetic materials (steel, cobalt, nickel, cast iron) can be inspected for superficial defects and defects lying directly beneath by means of magnetic particle testing. The material is magnetized and then sprinkled with a penetrant (magnetizable particles). These then accumulate at the crack. The magnetic particle testing is suitable for detecting defects with a maximum depth of 0.5 mm. The iron oxide powder is applied together with oil due to the stronger optical effect. Fluorescent test agents are then irradiated with UV light. Electromagnetic treatment is performed with direct or alternating current. After the materials testing, the part is cleaned and demagnetized.
Penetrant testing (PT, red-white test)
This nondestructive testing is used on nonporous and nonferromagnetic, metallic surfaces. This makes it possible to detect even the smallest defects. The material tester applies a red penetrant and lets it soak in. As a result of the capillary effect, it penetrates every pore and defect. He then removes the dye layer with a special cleaner and applies a white developer. After the penetration time, the slightest unevenness and cracks can be detected: The defects marked in red by the capillary effect form a strong contrast to the white material surface. After final cleaning, he documents the errors. This materials testing is used primarily in steel and bridge construction.
Radiographic testing (RT, X-ray inspection)
Gamma and X-rays are used for radiographic testing. They are suitable for detecting volume defects in plastics and metal materials (cast iron, steel). The X-ray inspection is used to display material differences and part densities. It uses X-ray tubes and radionuclides that emit gamma radiation. Differing material densities and thicknesses are shown as differently blackened zones. Bright areas on the film indicate a high material density. Defects also have a different density and can be detected by different brightness levels. Even the smallest cracks can be identified depending on the beam angle, resolution and contrast. Radiographic testing is used as standard, especially for safety-relevant materials and parts (cast parts in power plants, welding seams) and to identify volume defects.
Eddy current testing (ET)
Electrically conductive materials are often inspected by eddy current procedures. This is based on the fact that even defects near the surface have a certain permeability and electrical conductivity. The material is covered by a magnetic alternating field. This triggers electrical eddy currents in the component to be tested. However, material transitions and defects interfere with this eddy current field. Because the eddy current field lines that changed during their course produce a secondary magnetic field, they can be measured without any problems. Eddy current tests are quick and easy to perform and make even tiny defects visible.
Materials testing using industrial 3D computed tomography (CT)
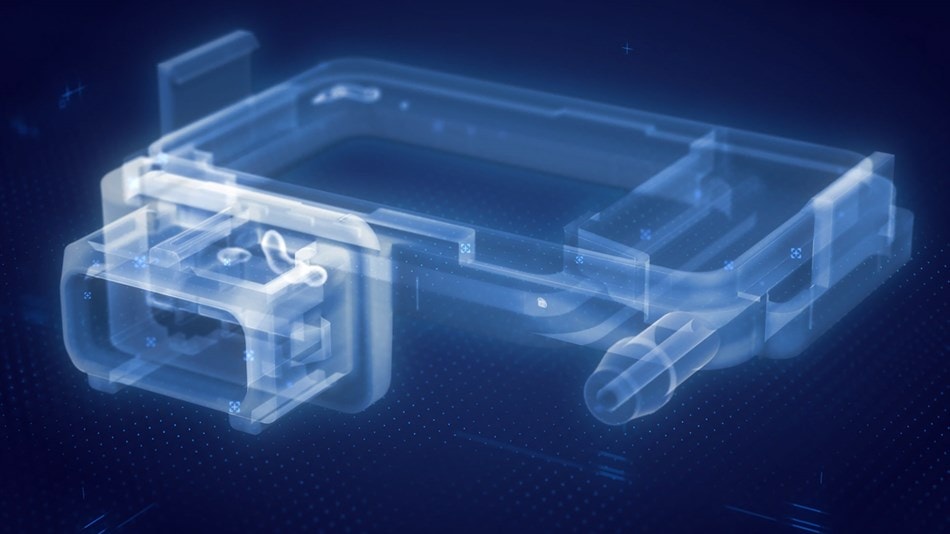
Developed for industrial applications, the 3D computed tomography system inspects even small complex parts. It works via nondestructive X-ray inspection and checks plastic parts and metal cast parts. In nondestructive testing of plastic, it first creates several 2D images and then merges them into 3D images. It scans even complex parts with high precision. Device control and measurement data evaluation are carried out with the same software. The alignment of the part in the computed tomography system is done using a virtual positioning aid. The software then automatically aligns the test specimen. This way, scans can be generated that meet the high metrological requirements of the industry and indicate core breaks and even the smallest defects, pores and voids in the part. They even capture components that older measurement technology could not test due to the part’s inaccessibility.
What are the benefits of nondestructive testing?
Compared to destructive testing, nondestructive testing has the advantage that the inspected part does not have to be remanufactured. This saves the industrial user money, time and additional personnel resources. The standardized methods used in nondestructive testing ensure the required quality and absence of defects. This can prevent accidents, environmental damage and property damage. The systems that are considered technically sound operate without downtime, so that production and delivery times can be met. Only defective parts are assigned to the scrap.
For which applications is nondestructive testing suitable?
Nondestructive testing is suitable for a variety of applications. In construction, it is used for nondestructive testing of concrete. The old building material is examined with regard to its remaining service life and stability. For example, the ultrasonic method (40 to 200 kHz) is used. This enables the precise localization of defects in the building material. A further field of application is the nondestructive testing of welding seams in the construction, mechanical engineering, automotive, aerospace, gas and oil industries as well as in shipbuilding.
Various methods can be used to detect voids, cracks, pores, dimensional and shape deviations, incomplete welds and foreign material trapped in welds. Nondestructive testing is also used for adhesive joints: Even combinations of materials that are difficult to bond, such as two metals, metal and glass as well as metal and fiber-reinforced composites, can now be produced. For this purpose, the Fraunhofer IFAM uses, for example, ultrasonic testing (phased array), X-ray computed tomography and thermography.
Conclusion
Nondestructive testing is used in many industrial areas. Thanks to technically optimized 3D CT scans, even complex structures and architectural extensions can be easily inspected.

